Friday 17 June 2016

Chocolate and Banana Muffins (Inspired by Nigella Lawson)

Do you have over-ripe bananas lying around in your kitchen? You forgot about them and now they seem to be of no use! You feel terrible about it and your parents make you feel worse. Well, there is a way they will be happy that you forgot!

Well I had a similar situation and hence went to Nigella Lawson for advice! Lol.
She has some amazing recipes which use ripe bananas. Well I picked up one, for making muffins. Don't you think muffins are the most convenient way to make and eat cake?

My mom and I tweaked the recipe here and there, according to what we had available at home. The next 20 minutes of impatient waiting was rewarded with utterly simple and delicious cups of loveliness!


(Makes 12 huge muffins)

Ingredients:

3 very ripe or over-ripe bananas
125g cream/ malai
2 large eggs
150g granulated sugar
3 eggs
225g flour/ maida
3 tbsp good quality cocoa powder
1.5 tsp baking powder
1 tsp of baking soda
2-3 tbsp of milk (if needed)

Special Equipment:

12-cup muffin tin


Method:

  1. Preheat the oven to 200°C and line a 12-cup muffin tin with cupcake liners. Don’t worry about getting special papers; you can grease the insides and dust your muffin cups with flour, so that no part of the surface remains uncovered. Keep aside. 
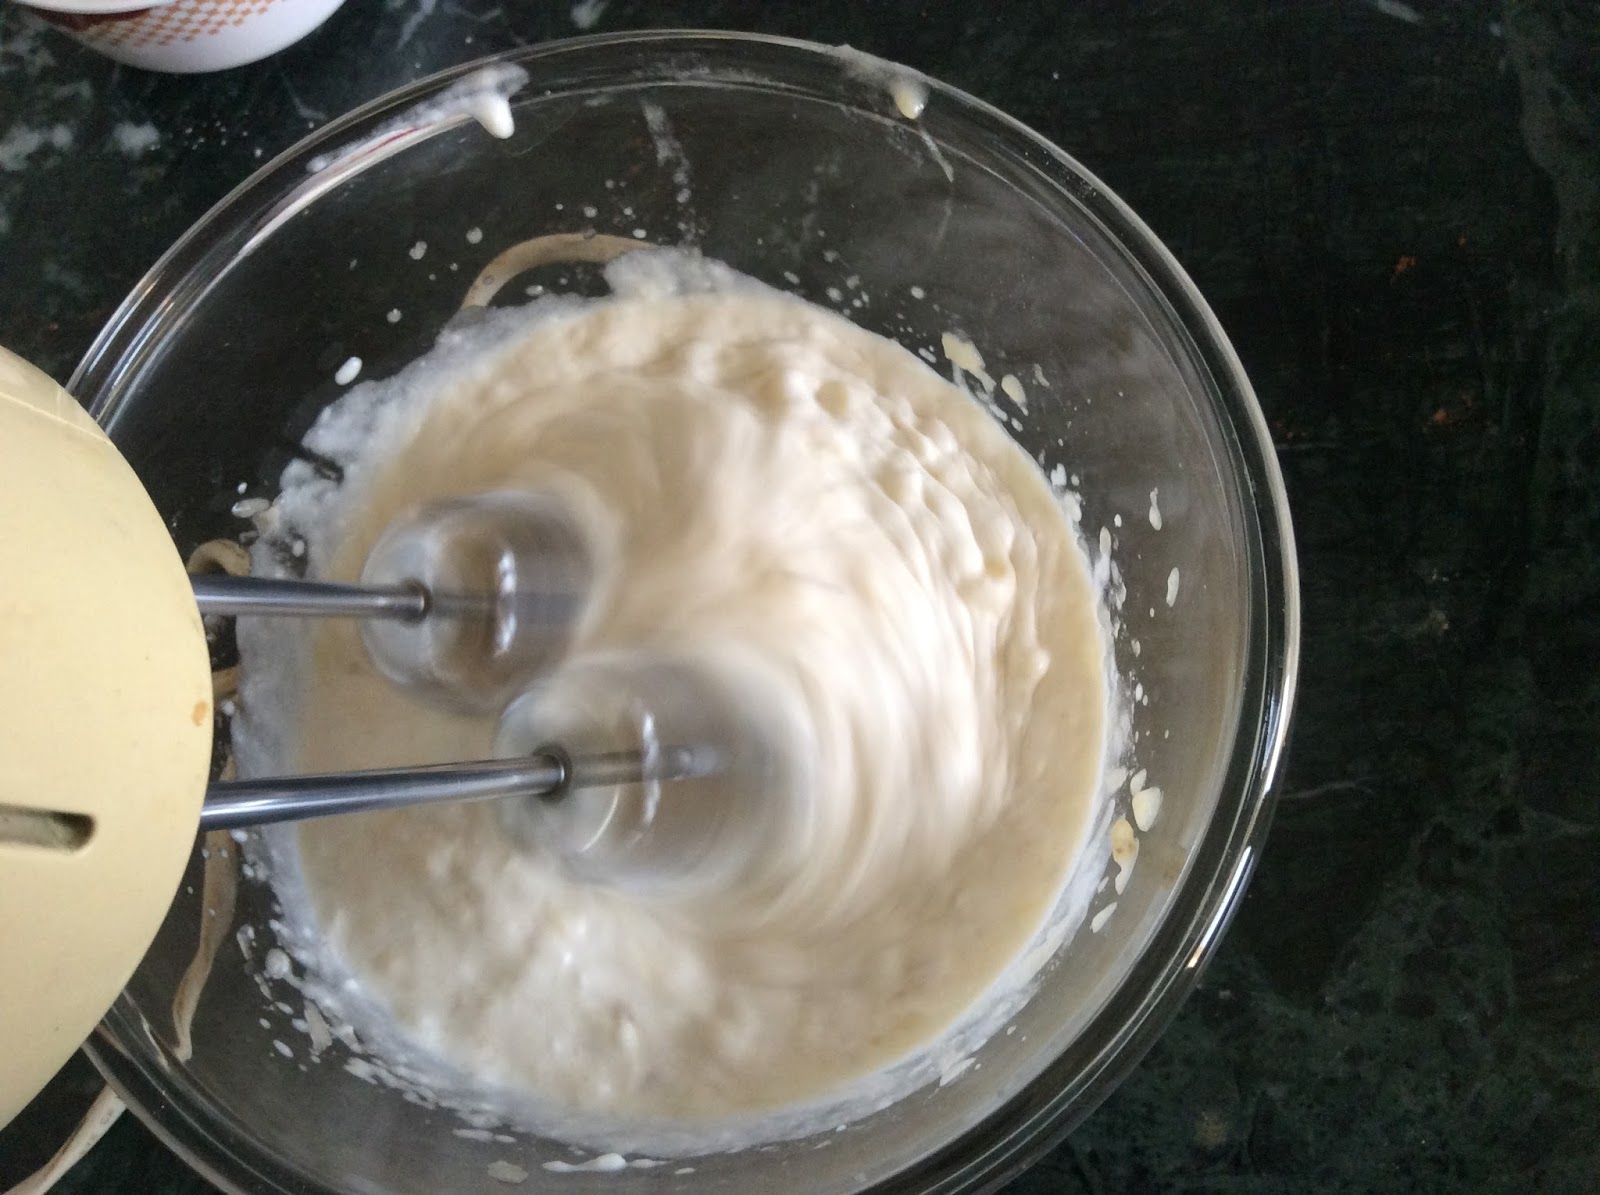
  2. Mash the bananas by hand or with an electric whisk. 
  3. As you beat, add the cream followed by the eggs and sugar. 

    You may even use oil instead of cream, However cream is a healthier substitute. The muffins made with oil will, of course, be smoother. 
  4. Now mix the flour, cocoa powder, baking powder and baking soda together and sift it well twice, to incorporate the dry ingredients into an even mixture. 

  5. Now add this mixture to banana mix (2-3 table spoons at a time) and keep beating gently. I recommend an '8' like motion.  
  6. If you feel the mixture is very thick, add milk to it (one spoon at a time) and adjust it to get a just-pouring consistency. Hit the pan on the slab so that the batter settles down. This ensure even baking.
  7.  Scoop out the mixture and pour it into individual cases, filling each with just half to give it some place to rise.
  8. Bake in the preheated oven for 15–20 minutes, by which time the muffins should be dark, rounded and peeking. Do the skewer test.  Remove from the oven once its done. Allow it to cool slightly in their tin for 5 minutes before removing to a wire rack. (More waiting!!!)
  9. Now comes the fun part! You can eat them in different ways: 

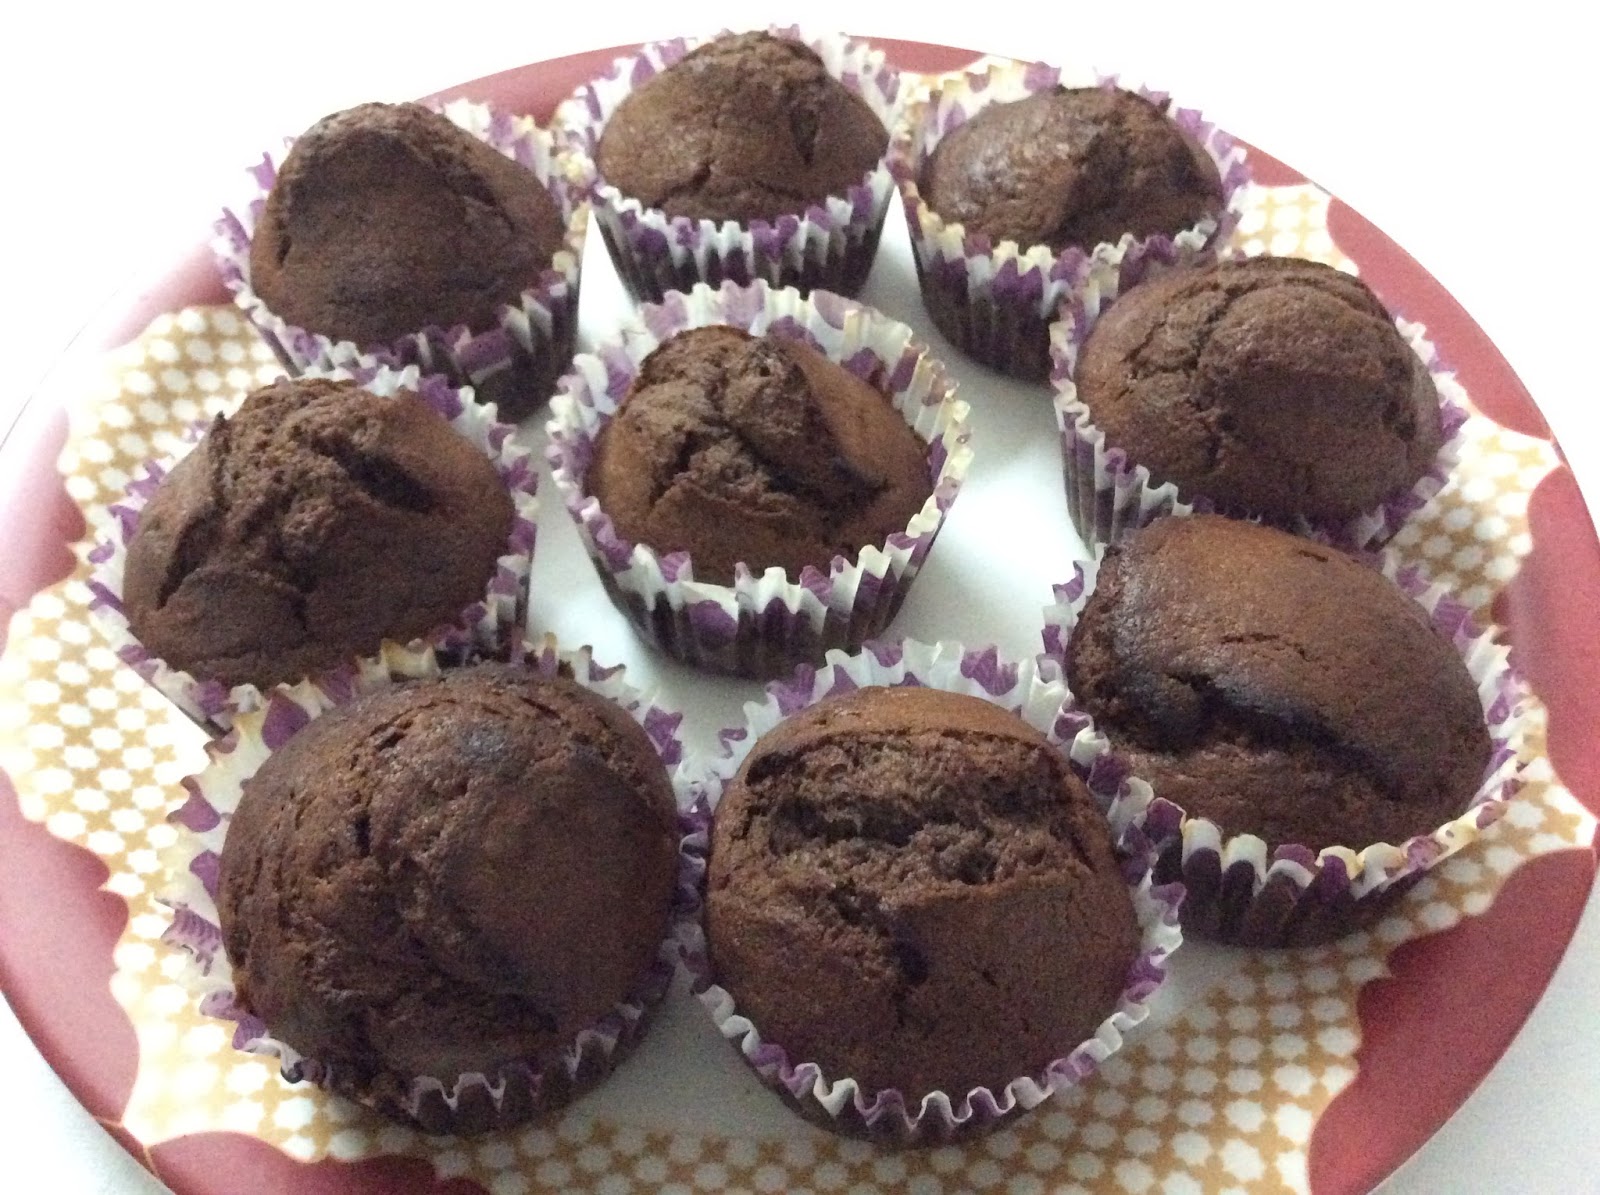
    • While they are piping hot in their original goodness (Dad's way)
    • Cut into half with a knife, spread some Nutella, inside, even outside if you wish. You have your very own muffin/cupcake with chocolate hazelnut icing. (My way)
    • Drizzle some cool Hershey's syrup over your warm muffins and eat with an ice-cream of your choice. (Mom's favorite)

Saturday 7 May 2016

Chocolate Cake with frosting

One of the most loved flavours in desserts has been Chocolate. The smooth, creamy texture of chocolate, as it slowly melts in your mouth!! Don't you think, it is one of the best feelings in the world? The endorphins (feel-good hormones) produced give us a feeling, incomparable to any other!!  They also contain anti-oxidants which protect the body from aging! That's some good news! ;)

The secret to a classic chocolate cake, is simply air and more air, as this will guarantee a light and fluffy cake. Try this recipe yourself to prove to yourself just how easy it is to make a creamed cake!!


Ingredients:

175g unsalted butter, softened, (plus extra for greasing)
175g granulated sugar
3 eggs
125g self-raising flour, (plus extra for dusting)
50g cocoa powder
1 tsp baking powder
2 tbsp of yoghurt


Filling:

50g unsalted butter, softened
75g icing sugar, (plus extra for dusting)
25g cocoa powder
2-3 tbsp milk, or as needed


Special Equipment:

2* 17cm round cake tins


Method:

  1. Preheat the oven at 180ºC /350ºF. Grease the cake tins with butter and dust it with flour till it is well-covered.
  2. Wet ingredients: Place the softened butter and sugar in a large mixing bowl. Use an electric whisk to cream the two ingredients together until light and fluffy.
    Remember: Cream the butter and sugar till 3-4 minutes, otherwise your cake will not get a light texture. The more you beat at this stage, the better it will come out.  
  3. Add the eggs one a time to the creamed mixture, beating well after each addition using an electric whisk. To begin with the eggs will seem separate from the creamed mix, but on further blending, they will eventually combine and take on an "emulsified" or a well-blended appearance that is soft and creamy looking.
     
  4. Dry ingredients: Sift the flour, cocoa and the baking powder into a separate bowl. Though it is not essential, yet if you want you may sift the mixture twice for a well-aerated mix. 
  5. Now fold in the butter and sugar mixture into the dry mix using a figure-of-eight motion. No need to google this term. it is as simple as it sounds. Make an "8" using your spatula. All your ingredients will get blended uniformly. 
  6. Fold in the yoghurt and milk. The flour mixture must be gently folded to avoid knocking out the-very-important air out of it. I had to add extra milk as the consistency was not as viscous as much as I wanted it to be. It should flow when tilted.
  7. Divide the mixture evenly between 2 cake tins by alternately filling them with equal spoonfuls of mix. Or else you may even bake it in just 1 cake tin and then divide the cake into 2 halves. I have a trick, scroll to the end for the trick ;). 
  8. Now spread the mixture out so that there is a slight dip in the centre, to prevent the cake from peaking in the centre. This is a very useful advice that I once received from someone. 
  9. Bake the cake for 40-45 minutes. Insert a metal skewer in it, check if it comes out clean and dry! Let the cakes stay in the tin for 5 minutes. Remove and place them on a wire rack to cool down.

Make the Buttercream filling:

To make the Buttercream filling, mix together the butter, icing sugar and cocoa by beating them together until smooth, soft and thoroughly blended. If the buttercream is a little tough, add a drop of milk and mix again until it is soft enough to spread.

If you have baked 2 cakes, turn and place one of the cakes on the wire rack (preferably the one which has risen more than the other). 
Spread the filling over its bottom with a spatula, while rotating the plate, to evenly spread the frosting. Place the other cake upside down on this. Since I was left with some extra frosting I layered it on top as well. You may also dust it with some icing sugar.


Remember: Wait for 10-15 minutes for the cake to cool down, or else the icing would melt. 

 `

THE TRICK!

If you wish to bake just 1 cake and half it:
Tighten a thread around the middle of the cake. tighten the thread gently and it will automatically cut the cake into a neat half. 


Looks like a giant chocolate macaron! 

Later once you refrigerate it, you may just have it as it is..... or even better, heat it for 10-15 seconds in the microwave, and add a dollop of any ice-cream of your choice!!!

Feeling - INCOMPARABLE!!

Friday 22 April 2016

Vanilla Muffins

Being pretty busy, I have not been posting recipes. That's not the only reason though. There is a fatness-due-to-too-much-baking-crisis going on!! It stalled me for only a while though. I'm back now! I will be starting with the rectification of the muffin debacle that happened a few months back!

This time the muffins did not sit in the refrigerator for even a minute! They were gobbled up by us, in less than 15 minutes!! That's exactly the same time it took me to bake them!

I won't waste any more of your time. Scroll down for the recipe. GO go go go!!! 


(Makes 12 muffins)

Ingredients:

  • 100g plain flour, sifted
  • 1 tsp baking powder
  • 100g castor sugar
  • 1/4 tsp salt
  • 50g unsalted softened butter
  • 1 & 1/2 eggs, at room temperature
  • 125 ml milk
  • 1/2 tsp vanilla extract

Special Equipment:

  • 2 x 6-hole cupcake trays

Method:

Preheat the oven to 180ºC /350ºF. Coat the entire inner surface area of the cupcake tray with oil. Sprinkle flour over it and tilt the tray giving it repeated jerks so that it covers the entire surface. In a cupcake try it is tricky as you need to coordinate it for all the pockets. Its no rocket science though! 

Or you may just use cupcake liners!! Genious invention; need to get them for myself too!


Make the batter: 

  1. In a bowl, place the flour,baking powder, sugar,salt and butter. Rub in with your fingertips until the mixture is well combined. Rubbing in the butter, coats the flour with fat, without melting the butter too much. It will resemble a smooth and soft doughy consistency.

  2. Whisk the eggs, milk and 1/2 tsp of vanilla extract together until it blends well.

  3. Slowly pour this mixture into the dry ingredients, whisking constantly (5-7 min), until you have a smooth batter. That's all!!! Its just a 15 minute job!


Bake the muffins: 

  1. Now pour the batter into the cases; but fill only half the case to give it place to rise. Have faith, it will rise. 
  2. Bake them for 20-25 mins, until well risen. Do the metal skewer test..you know it. insert it, check if it comes out clean and dry! ITS READY!
  3. Leave the muffins in, to cool, for 5 mins before taking them out of the tray.

Monday 15 February 2016

Prunes Honey Oat Cookies (Eggless)

Well, my obsession for prunes has not ended yet. Though the next recipe on the agenda called for Hazelnuts and Oat Cookies, I failed to find any good quality hazelnuts in the part of the city where I live, so substituted them with prunes instead!

I do have a few hazelnut recipes coming up soon, hence I'm still on the look out for a great place where I can find them. Will make those recipes once I have acquired some quality hazelnuts. Quality ingredients are a necessity!!

Though these cookies called for 1 egg, I simply substituted it with 2 tsps of baking powder whisked in oil and and water. You may add an egg instead if you like. My vegetarian loved ones were not happy that I would add eggs in all my recipes. So these cookies had to go eggless- just for them!


(Makes about 18-20 cookies)

Ingredients:

  • 100g prunes, chopped
  • 100g unsalted butter, softened
  • 200g granulated sugar 
  • 2 tbsp water
  • 1 tsp vegetable oil
  • 2 tsp baking powder
  • 1 tsp vanilla extract
  • 1 tbsp runny honey
  • 125g self raising flour, sifted
  • 125g porridge oats
  • a pinch of salt
  • a little milk, if needed


Method:

  1. Place the butter and sugar in a large bowl and whisk them. Cream them together until the mixture become fluffy.
  2. Mix water and oil  in a small bowl and add baking powder to it. Whisk it and you will see the fermentation process kick started immediately. Add this mix quickly into the wet mixture along with honey and vanilla extract. Whisk it all for a few more minutes, until thoroughly combined. 
  3. Take the sifted flour in a separate bowl; add in the oats, salt and the chopped prunes and combine it well. Add them gradually to the wet mixture, taking a little at a time. The cookie dough must be soft enough to shape them. If it feels too stiff, add a little milk or flour if it is too sticky.
  4. Preheat the oven to 190ºC. Line the baking tray with parchment paper (It is easily available at a stationery shop a.k.a butter paper).
  5. Now make small bite sized molds and roll them up. Flatten them slightly and place them on the baking tray, keeping adequate distance between them as they would spread and grow in size upon baking.
  6. Bake them for 15-20 minutes. Once you see that the sides are slightly golden brown, remove them using a pallete knife and place them on a wire rack to cool down.
  7. The perfect cookies should be golden brown on the sides and light and chewy in the center with a soft crunchiness of the oats.
If you feel that your cookies are pretty hard after cooling, don't worry you have not ruined them. Simply store them in a container with a slice of bread. By next day the cookies would be perfect to bite into! Change the bread every day.
But if you want an immediate solution, microwave them along with a bowl of water kept on the side and you may have it like that as well, though its crunchiness will disappear!

Wednesday 27 January 2016

Prune Cinnamon Buns


Last month, when my sister returned from US, she surprised me with a bucket full of exotic foods, one of which was a pack of lovely dried pitted plums – popularly called Prunes.

As soon as she showed them to me, before anything else, I rushed to my baking book to look for a recipe which would use prunes. Sadly, there was none. I wanted to stick to the recipes in the book for this blog, but nevertheless, I started hunting for one, off the internet  - I was game for any recipe that could be prepared with prunes playing the protagonist.

In the first few minutes, I came across tons of recipes; there were banana prune muffins, prune cakes, chocolate prune cakes, double-chocolate prune cakes. None of them really seemed to fascinate me. After glancing through a dozen websites, I finally landed on to BBC’s Prune Cinnamon Buns Recipe.
This was it! This had to be the one! What can I say, I'm a sucker for Cinnamon!  
After 2 days of preparing this amazing dish, here I am with its recipe, snaps and a point-by-point instruction on how to make these cin-ful buns!

(Makes 12 buns) 

Ingredients:

For the dough 
  • 500g white flour (Maida)
  • 1 tsp salt
  • 50g light brown sugar ( I used ground white sugar instead, the sweetness of the two are the same, I checked)
  • 15g fresh yeast (1½ tsp dried yeast)
  • 75g unsalted butter, softened
  • 200ml milk
  • 2 fresh eggs, plus one egg yolk, for glazing
  • Flavourless oil, for oiling 
       For the filling
  • 200g prunes, roughly chopped
  • 1 orange
  • 100g light brown sugar or ground white sugar
  • 1½ tsp ground cinnamon
  • 100g butter, softened, plus extra for greasing
For the syrup
  • ½ an orange juice
  • 25g/2oz caster sugar


Method:

1. The fruit should be soaked for a minimum of half an hour, but it can be made as much as a day in advance and that’s what I did, hence the 2-day process. Chop up the prunes roughly; squeeze out the juice of 1 orange, strain it to remove all seeds and fibre and soak in the prunes. Keep this in an airtight container and store it in the refrigerator for a day.


        2. Start the process of making the buns the next day in case you plan to soak the fruit for a day. Since many ingredients are not easily available in India, we tend to use substitutes. In the absence of fresh yeast I have used dried active yeast like many of us will. Warm the milk and add the yeast in it while stirring the milk vigorously, till there are no remnants. Squash them using the back of a spoon, it will soon dissolve in the warm milk. Set aside for 10 minutes.
    
  3. Meanwhile, mix together the flour, salt and sugar in a bowl. Rub the softened butter into the flour mixture with your fingertips. 
      Now this is a technique which needs care. The idea is to rub the butter in the flour to make breadcrumb like consistency, for which you must ensure that the butter doesn’t melt. Thus the aim is to keep the butter as cold as possible. If it is winter, then you will face little problem. In summers, you may take the following precautionary steps: 
   i. Ensure your hand is cold; run it under cold water for a minute.
  ii. Use only your fingers to combine and rub the butter into the flour as the temperature of your fingers is lesser than your palm.


    4.   You can check for the consistency by pressing the flour in your fist just for 5 seconds; if it binds together like in the picture below – you have nailed it!


5.   Now, make a well in the flour mixture. Pour the milk into the well and crack in one egg. Bring the dough together with your hands or with a spatula. (Though it gets a little messy, I would recommend using your hand.)  

6.   What you finally get will be a soft, supple dough - if it feels a little wet and sticky, don't panic. Keep mixing and the flour will absorb the liquid eventually.


7.   Turn the dough out onto a clean surface and knead for 10 minutes or until the dough is smooth and elastic. Cut a small piece off and stretch the dough as thin as you can – if you can see light shining through the dough and you can see the shadow of your fingers held behind the thinnest part, it is ready.


8.   Put the dough in an oiled bowl, cover with a damp tea towel and leave to prove for about 80-90 minutes. (Proving is the process during which the yeast starts working on the flour.)


9.   Meanwhile take a  small mixing bowl, beat the sugar and cinnamon into the softened butter with a fork until well combined. Set aside.


10. Lightly grease the base and sides of a deep roasting tin roughly 34x24cm/13x9in with butter and line with baking parchment.

11. When the dough has nearly doubled in size, tip it out of the bowl and knock the air out. Flour the work surface before you start. Knocking the air out removes the large air bubbles out of the dough and lend an even texture to the baked bread. I have attached pics as well as a video of the process.


12. Roll the dough into a rectangle, with a thickness of about 3mm. The long side of the rectangle should be about 12in long. Push the rolling pin away from your body,always rolling in one direction until there is an even thickness all over.  


13. Spread the cinnamon paste over the surface of the dough, ensuring the paste reaches all the edges. Drain the soaked prunes; albeit there won’t be much juice left, yet reserve if there is any, then sprinkle the prunes evenly over the dough.


14. Starting with the long side of the rectangle, roll the dough up into a sausage shape. You may need two people to work together at rolling the dough uniformly along the length. Flour the work surface and lay the rolled dough on top of the flour before cutting into rolls into 12 equal slices.

15. Place the slices side by side, with the spiral facing up, into the lined roasting tin. Cover with a damp tea towel and leave to prove again for about 45 minutes.


16. Preheat the oven to 200C/400F/Gas 6.When the buns have risen and feel springy to the touch, they are ready to bake. Beat the remaining egg and egg yolk together in a small bowl, and brush the tops of the buns with egg glaze. This will give the buns a shine and a lovely colour.


17. Bake the buns at 200C/400F/Gas 6 for 10 minutes and then lower the oven temperature to 180C/350F/Gas 4. Cook for a further 20 minutes.


18. While the buns are baking, make the syrup. Pour the reserved orange juice(if any) plus the juice of half an orange into a small saucepan with the sugar. Gently heat this mixture, stirring until the sugar dissolves. Bring the syrup to a boil and cook for not more than a minute. Set aside.


19. When the buns have finished baking, remove them from the oven and brush with the syrup so that the citrus freshness gets soaked into the buns. Transfer the buns on the paper to a wire rack to cool.


          Making these Cinnamon Buns has been a lot of fun. They come out really pretty and can be made prior to a fancy dinner party. Let me know how do you like them if you try it yourself!